|
Bonding Test

Franklin Institute Research Laboratory, Inc.
A subsidiary of the Franklin Institute
Mr. D. Gernert
Energy Independence Assoc.
325 West Swedesford Road
Exton, Pa. 19341
Subject: FIRL, Inc. Project 031-A5465-01 (1731)
Engine Treatment Product
Dear Mr. Gernert:
We selected a wrist pin from the engine parts you sent us. The pin was sectioned
into the three parts with a cut off wheel. One part was cleaned in a ultrasonic
cleaner and then nickel coated, another uncleaned part was also covered with
nickel, while the third part's surface was studied with no preparation.
All three parts were studied in the
Scanning Electron Microscope. The uncleaned, uncoated section is shown in
Micrographs 1,2, and 3. The treated surface is seen in the upper part of the
micrograph, the uncleaned nickel coated sample was studied next.
An elemental x-ray line scan was run on the interface between the nickel and the
steel where the coating should be found.
Micrograph 4 shows the general area where the analysis was run. Micrograph 5
shows the results of the analysis. The bright straight line near the center of
the micrograph is the exact area the was analyzed. The upper trace represents
the relative amount of the element, which is the experiment, will show where the
edge of the sample is located. The lower trace, which is the nickel, shows the
location of the coating relative to the surface of the steel. The space between
the peak iron reading and the peak nickel reading represents the thickness of
the coating. Micrograph 5 was at 10,000x; therefore, 1 micron is measured as
1 cm, which is the approximate distance between the nickel and the steel part.
The third sample which was ultra-sonically
cleaned for about one quart of an hour to remove any surface material that may
be on the surface, was studied next. The reason for the surface cleaning was to
remove any unexpected material from the surface before the nickel coating is
applied. We actually expected the product to also be removed, but later found it
was still there. Micrograph 6 shows the same relationship as micrograph 5; the
thickness of the coating again is measured 1 to 2 microns.
The above experiments show that coating is
to be 1 to 2 microns thick and bonded to the surface.
Sincerely,
H. Thomas Tucker
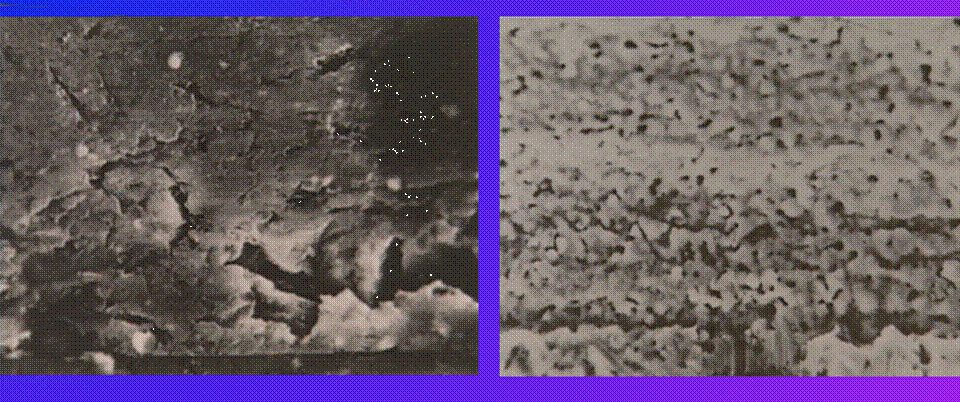
These photographs show XcelPlus bonded to a metal surface

The image on the left shows a machined metal surface magnified 2,000x with an
electron microscope. The peaks and valleys that you can clearly see under this
magnification are called asperities. The image on the right is also of a
machined metal surface, Note that the bonding is uniform and the asperities are
still pronounced and not filled in. This permanently fused layer of dry
lubrication measures only 1 - 2 microns in thickness and does not affect the
machined tolerances in any engine or machinery.
|
